A footwear tech pack is a multi-page technical document that translates a shoe design into manufacturing-ready specifications—covering dimensions, materials, construction methods, colorways, hardware details, logo placement, and grading rules—so that a factory can produce the shoe exactly as the designer intended without ambiguity.
Incomplete or poorly structured tech packs are the single most common cause of sample rejection, production delays, and cost overruns in private label footwear—responsible for an estimated 60–70% of first-sample failures across the industry, based on our internal production data.
Joes Footwear has reviewed and processed over 3,000 tech packs from brands in 30+ countries during 17 years as a private label footwear manufacturer. This guide explains every component a footwear tech pack must contain, shows common mistakes that cost brands time and money, and provides a practical framework for creating production-ready documentation—whether you are working with an in-house designer, a freelancer, or building your first shoe brand without formal design training.
Why a Tech Pack Is the Most Important Document in Shoe Development
A tech pack is the contract between your creative vision and the factory’s production capability. Without one, every aspect of your shoe—material type, color shade, heel height, stitching pattern, logo size—is open to interpretation. And interpretation, in manufacturing, means variation. Variation means your sample comes back looking nothing like what you imagined.
The tech pack eliminates interpretation by replacing verbal descriptions and mood board images with precise, measurable specifications. Instead of telling a factory “I want a brown leather ankle boot,” a tech pack specifies: upper material is 1.2 mm chrome-tanned full-grain cowhide in Pantone 19-1121 TCX, shaft height is 12.5 cm measured from the top of the heel seat, sole unit is a 3 cm stacked leather heel with a rubber top lift, and the inside zipper is a YKK #3 in antique brass. This level of specificity is what separates professional product development from guesswork.
From the factory’s perspective, the tech pack determines how efficiently we can develop your sample. A complete tech pack allows our pattern engineers to begin work immediately. An incomplete one triggers a cycle of questions, clarifications, assumptions, and revisions that can add 4–8 weeks to your development timeline and increase sampling costs. For a detailed look at how sampling timelines and costs work, see our guide to shoe manufacturing costs.
The Core Components of a Footwear Tech Pack
A complete footwear tech pack contains 8–12 sections, depending on the shoe’s complexity. Every section serves a specific function in the communication chain between brand and factory. Missing even one section creates an information gap that the factory must fill with assumptions—and assumptions are where errors originate.
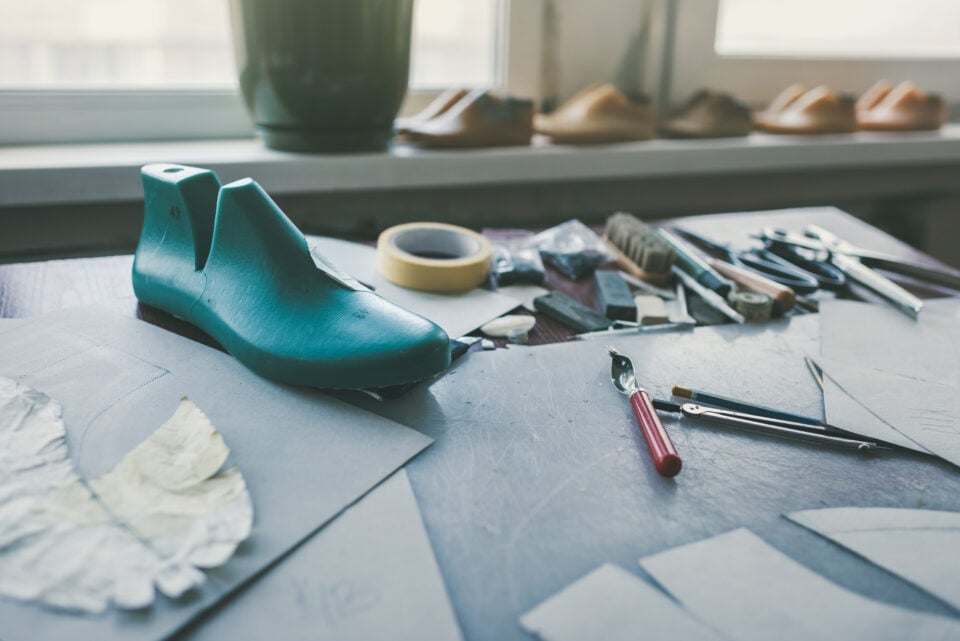
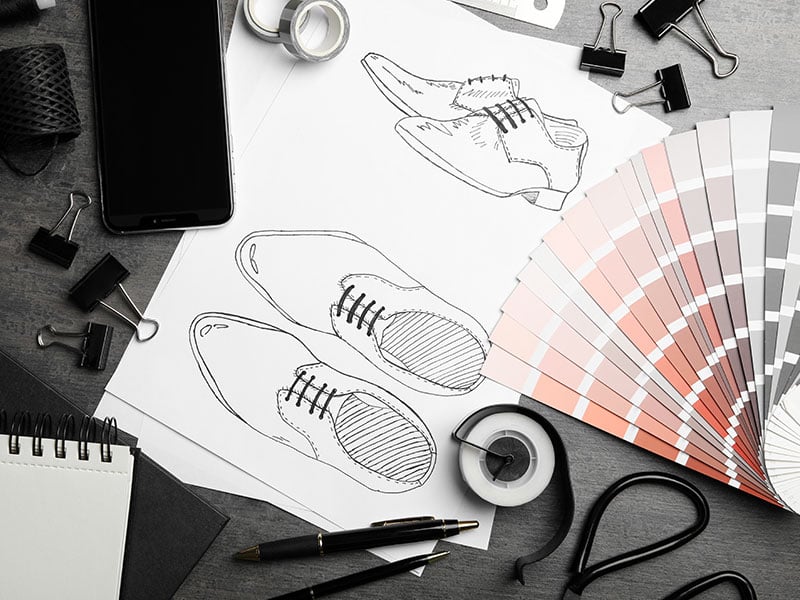
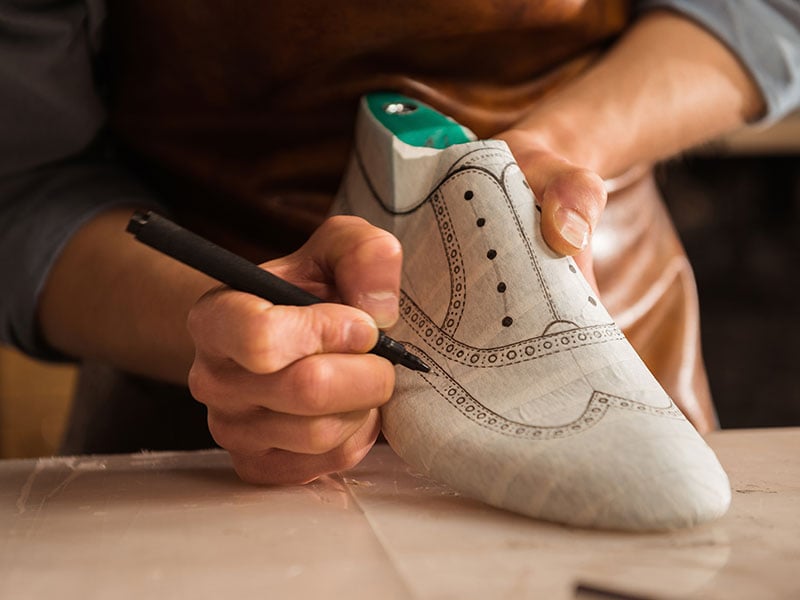
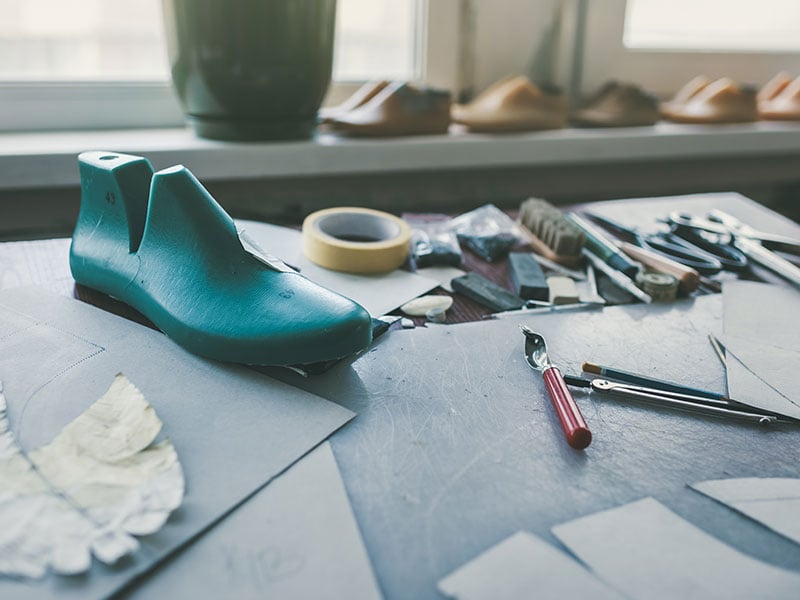
Design Illustrations and Technical Drawings
The visual foundation of any tech pack is a set of detailed drawings showing the shoe from multiple angles: lateral (outside) view, medial (inside) view, front view, back view, top view, and bottom (sole) view. These are not fashion sketches—they are dimensioned technical drawings that show every panel line, stitch line, edge treatment, hardware position, and construction detail.
Professional footwear tech packs use flat 2D CAD drawings (created in Adobe Illustrator, Rhino, or specialized footwear CAD software) rather than 3D renderings or hand sketches. CAD drawings are scalable, dimensionable, and universally readable by factory pattern teams. Each drawing should include callout lines pointing to specific features with labels: “Panel A — full-grain leather,” “Stitch line — 2.5 mm SPI, color-matched thread,” “Zipper — YKK #3, antique brass.”
If you do not have CAD capability, detailed hand sketches with clear annotations are acceptable for initial development—but understand that the factory will need to redraw them into production-ready patterns. This adds time and introduces a layer of interpretation that CAD drawings avoid. Our development team at Joes Footwear can translate sketches into CAD patterns as part of the OEM development process.
Bill of Materials (BOM) — Every Component Specified
The BOM is a comprehensive list of every material and component that goes into the shoe. It is the single most critical section of the tech pack from a manufacturing standpoint because it directly determines cost, sourcing lead time, and production feasibility.
A complete BOM for a typical women’s ankle boot might include 15–25 line items: upper leather (type, thickness, finish, color reference), lining material (leather, textile, or synthetic, plus color), insole board material and thickness, sock lining (footbed cover material), heel material and construction type, outsole material and tread pattern, zipper brand, size, type, and finish color, metal hardware (buckles, rivets, eyelets—specifying material, size, and finish), thread type and color for each stitch line, reinforcement materials (toe puff, heel counter, steel shank), adhesives and bonding specifications, packaging components (box, dust bag, tissue, hang tags), and branding elements (logo stamp, printed insole, woven label).
For each item, specify the exact material, the supplier or brand name if relevant (e.g., “YKK” for zippers, not just “zipper”), the color reference (Pantone number or physical swatch), and any quality certifications required (LWG for leather, OEKO-TEX for linings). For a detailed overview of leather types and how to specify them, refer to our shoe leather types guide. For sustainable material options, see our guide to sustainable and vegan shoe materials.
Color Specification and Pantone References
Color is one of the most common sources of miscommunication between brands and factories. Screens display colors differently. Printed references shift under different lighting. And leather absorbs dye differently than fabric or synthetic materials, meaning the same Pantone reference can produce visibly different results on different substrates.
Your tech pack should specify colors using the Pantone Textile Color System (TCX for textiles, TPG for coated papers). Include the Pantone code, the color name, and a note about acceptable tolerance: “Pantone 19-4052 TCX Classic Blue ± 5% variation acceptable.” For critical color accuracy, request a lab dip (a small swatch dyed to your specification) before approving production material.
If your design uses multiple colors, create a color map—a version of the technical drawing with each panel or component filled in with its specified color and labeled with the corresponding Pantone reference. This eliminates any confusion about which color goes where, especially in multi-material designs.
Dimensions and Measurement Specifications
Every measurable feature of the shoe should be documented with exact dimensions in millimeters or centimeters. Key measurements include: heel height (measured from the top of the heel seat to the ground at the center of the heel), shaft height (for boots—measured from the top of the heel seat to the top of the shaft), shaft circumference (at the top opening, for boots), platform height (if applicable), sole thickness at the ball of the foot, insole length, and any hardware dimensions (buckle width, eyelet diameter, logo plate size).
Specify a base size for all measurements—typically EU 37 for women’s shoes and EU 42 for men’s. The factory will grade (scale) the dimensions up and down from this base size according to standard grading rules or your custom grading table (covered later in this guide).
Construction Method and Assembly Notes
Your tech pack should specify the construction method: cemented (glued), Blake stitched, Goodyear welted, vulcanized, or strobel. Each method produces different durability, flexibility, weight, and cost characteristics. If you are unsure which construction suits your shoe type, our development team can advise—but this decision must be made before sampling, not after.
Assembly notes cover the sequence of operations and any special instructions: edge painting color and method (hand-applied vs. machine), lasting method (string lasting, staple lasting, slip lasting), sole attachment details (adhesive type, primer requirements, stitching specifications), and finishing instructions (brushing, polishing, waxing, burnishing). These notes prevent the factory from applying default processes that may not match your quality expectations.
Logo and Branding Specifications
Document every brand touchpoint on the shoe and its packaging: insole logo (debossed, printed, or heat-stamped—with size, position, and artwork file reference), outsole logo (molded into sole or applied), tongue or collar label (woven, printed, or heat transfer—with dimensions and placement), metal logo plate (if used—material, finish, dimensions, attachment method), box design (print file, dimensions, material), dust bag (material, print, size), and hang tags or tissue paper (if branded).
Provide all logo artwork as vector files (AI, EPS, or SVG) at production resolution. Raster images (JPEG, PNG) are not suitable for debossing, embossing, or mold engraving. Include a branding guide or style sheet if you have one—it helps the factory maintain visual consistency across multiple shoe styles and production runs.
Size Grading and Fit Specifications
Grading is the process of scaling a shoe design up and down from the base size to cover a full size range. Grading affects not just the length and width of the shoe but also the proportions of every visible element—heel height, shaft circumference, hardware scale, and strap length.
Standard Grading Rules vs. Custom Grading
Most factories apply standard grading increments based on the shoe’s market (EU, US, UK sizing). Standard European women’s grading typically uses a 6.67 mm length increment per full size. Standard men’s grading uses a similar increment. These increments are well-established and work for most conventional shoe types.
Custom grading is necessary when your shoe has features that do not scale linearly—for example, a boot shaft that should increase in circumference more aggressively between larger sizes to accommodate wider calves, or hardware that should remain the same size regardless of shoe size. Document any custom grading rules clearly in your tech pack, ideally in a grading table that shows the exact measurement for each size.
Fit Notes and Last Selection
The last (the foot-shaped form around which the shoe is built) determines the shoe’s fit, proportions, and silhouette. Your tech pack should specify the last shape by reference to the factory’s last library or by providing custom last specifications: toe shape (round, almond, pointed, square), instep height, ball girth, heel width, and overall profile (standard, narrow, wide).
Include fit notes that describe the intended wearing experience: “Snug fit at the heel with moderate room in the toe box,” or “Relaxed fit for sockless wear.” These subjective descriptions supplement the objective last measurements and help the factory’s fit technician make adjustments during sample evaluation.
The 8 Most Common Tech Pack Mistakes That Delay Production
After reviewing thousands of tech packs from brands worldwide, we have identified the errors that cause the most costly delays and misunderstandings. Avoiding these mistakes can save you 4–8 weeks of development time and hundreds to thousands of dollars in unnecessary sampling iterations.
1. Using Mood Board Images Instead of Technical Drawings
A photograph of a competitor’s shoe or a Pinterest screenshot is not a tech pack. The factory cannot extract reliable dimensions, construction details, or material specifications from a photograph. Always provide dimensioned drawings with labeled components, even if they are rough sketches.
2. Missing or Vague Material Specifications
Writing “leather upper” without specifying the leather type (full-grain, top-grain, nappa, suede), thickness (0.8 mm, 1.0 mm, 1.2 mm), finish (aniline, semi-aniline, pigmented), and color (Pantone reference) gives the factory complete discretion over material selection. The sample you receive will reflect the factory’s default choices, which may not match your vision or price point.
3. No Base Size Indicated
All measurements in a tech pack should reference a specific base size. Without a base size, the factory does not know which size the dimensions apply to, making grading impossible. State clearly: “All dimensions reference EU 37” (or your chosen base).
4. Color References Without Pantone Codes
Describing a color as “cognac brown” or “navy blue” is insufficient. “Cognac” means different things to different people and different factories. Always use Pantone codes, and always specify which Pantone system (TCX for textiles, TPG for paper).
5. Ignoring Hardware Details
Buckles, zippers, rivets, and eyelets are small components that disproportionately affect the shoe’s perceived quality. Specifying “gold buckle” without noting the material (zinc alloy, brass, stainless steel), finish (polished, matte, brushed, antique), and size (width in mm) leads to cheap-looking hardware that undermines an otherwise well-made shoe.
6. No Construction Method Specified
If you do not specify cemented, Blake, or Goodyear welt construction, the factory will default to the cheapest option (cemented) or to whatever they typically use for that shoe type. If your brand’s value proposition includes a specific construction method, it must be documented in the tech pack.
7. Missing Sole and Heel Specifications
The sole unit is often under-specified in tech packs. Beyond material (TPR, rubber, leather, EVA), you should specify tread pattern, thickness at key points, flexibility requirements, and color. For heels, specify height, shape (block, stiletto, stacked, cone), and material (injection ABS, wrapped wood, stacked leather).
8. No Packaging Specifications
Packaging is part of the product experience. If your tech pack does not include box dimensions, box print artwork, tissue paper specifications, and dust bag details, the factory will use generic packaging—which undermines the premium experience you are trying to create. Include packaging specs in every tech pack.
Tech Pack Formats and Software — What the Industry Uses
There is no single industry-standard tech pack format, but certain tools and formats are more effective than others for communicating with footwear factories.
Adobe Illustrator (AI) — The Industry Standard for Drawings
Most professional footwear tech packs use Adobe Illustrator for the technical drawings. Illustrator produces scalable vector graphics that can be dimensioned, annotated, and easily modified. The drawings are typically exported as part of a PDF tech pack document that combines illustrations with specification tables.
Excel or Google Sheets — For BOM and Specification Tables
The Bill of Materials, size grading tables, and measurement specifications are often maintained in spreadsheet format. This allows easy updating and version control as the design evolves through sample iterations. Many brands maintain a master tech pack as a combined PDF (drawings + specs) with a linked spreadsheet for the BOM.
Specialized PLM and Tech Pack Platforms
Product Lifecycle Management (PLM) platforms like Centric, Backbone, and Techpacker offer dedicated tech pack creation tools with collaboration features, version control, and factory communication portals. These platforms are valuable for brands managing multiple styles and factory relationships but add subscription cost and learning curve. For brands launching their first 3–5 styles, a well-organized PDF and spreadsheet combination is sufficient.
What Format Does Your Factory Prefer?
Always ask your manufacturer what format they prefer to receive tech packs in. Some factories have internal systems that accept specific file types; others work best with annotated PDFs. At Joes Footwear, we accept tech packs in any format—PDF, AI, Excel, PowerPoint, or even annotated sketches—and our development team translates them into our internal production documentation system.
How to Create a Tech Pack Without a Professional Designer
Many first-time brand founders do not have in-house design teams or the budget for a professional footwear designer. This does not mean you cannot create a functional tech pack—it means your approach needs to compensate for the lack of formal technical drawings.
The Reference Sample Method
One effective approach is to purchase a reference shoe (a commercially available shoe similar to what you want to produce) and use it as the basis for your tech pack. Photograph it from all angles with consistent lighting. Measure every dimension with calipers. Document every material by feel and visual inspection. Then annotate the photos with the modifications you want: “Change heel from 8 cm to 6 cm,” “Replace metal buckle with covered button,” “Change upper material from suede to nappa leather in Pantone 19-3928 TCX.”
This is not a substitute for a professional tech pack, but it gives the factory a tangible starting point that dramatically reduces interpretation risk. Send the reference shoe with your documentation—a physical sample is worth more than any number of photographs.
Working with Your Manufacturer’s Design Team
Many established private label manufacturers, including Joes Footwear, offer in-house design and pattern engineering services. You provide the concept (sketches, mood boards, reference shoes, verbal description of your vision), and our team translates it into a production-ready tech pack complete with CAD drawings, a detailed BOM, and grading specifications.
This approach works particularly well for brands using an ODM manufacturing model, where you are modifying an existing design rather than creating from scratch. Our design team can also help brands transitioning from ODM to OEM develop the technical documentation skills and design vocabulary needed for independent product development.
Hiring a Freelance Footwear Designer
Freelance footwear designers can create professional tech packs for $200–$800 per style, depending on the shoe’s complexity and the designer’s experience. Platforms like Upwork, Behance, and specialized footwear design networks connect brands with designers who have factory experience. When hiring a freelancer, verify that they have produced tech packs that have been successfully manufactured—design skill and production knowledge are different competencies.
The Tech Pack Lifecycle — From First Draft to Production Standard
A tech pack is not a static document. It evolves through the development process as samples are evaluated, fit is refined, materials are adjusted, and costs are optimized. Understanding this lifecycle helps you budget time and resources appropriately.
Version 1: Initial Development Tech Pack
The first version of your tech pack is the starting point for your initial development sample. It should be as complete as possible, but expect that some specifications will change after you see and handle the first physical sample. This version triggers pattern making, material sourcing, and last selection at the factory.
Version 2–3: Revision Tech Packs
After receiving your first sample, you evaluate it against your design intent and identify modifications: adjust heel height, change lining color, widen the toe box, relocate the logo stamp. Document every revision in an updated tech pack with a clear version number and date. Send the revision tech pack alongside detailed written comments and, if possible, annotated photos of the physical sample showing exactly where changes are needed.
Final Version: Production-Approved Tech Pack
The final tech pack is the approved standard for bulk production. It incorporates all revisions from the sampling process and represents the exact specifications that every production pair must match. This document becomes the reference for quality control inspections throughout the production run. Both you and the factory should sign off on this version before production begins.
For a complete walkthrough of how sampling connects to production, our upcoming guide on the shoe sampling process will cover each stage from development sample to pre-production approval.
Complete Footwear Tech Pack Checklist
Use this checklist to verify that your tech pack is complete before sending it to your manufacturer. Each item addresses a specific information need in the production process.
Design documentation: Technical drawings from all 6 views (lateral, medial, front, back, top, bottom). Each drawing annotated with component labels and callout lines. Dimensioned with key measurements referencing the base size. Color map showing Pantone references per component.
Materials: Complete Bill of Materials with exact specifications for every component. Pantone color codes for all visible materials. Leather specifications (type, thickness, finish, certification requirements). Lining and insole material specifications. Hardware specifications (brand, material, finish, size). Thread type and color per stitch line.
Construction: Construction method (cemented, Blake, Goodyear welt). Edge finishing method and color. Lasting method. Sole attachment details. Stitching specifications (SPI, thread weight).
Sizing and fit: Base size clearly stated. Full size range specification. Custom grading rules if applicable. Last reference (factory library number or custom specifications). Fit notes describing intended wearing experience.
Branding: Logo artwork in vector format (AI, EPS, SVG). Logo placement and size for each application (insole, outsole, tongue, collar). Box and packaging specifications with print-ready artwork. Dust bag, tissue, and hang tag specifications.
Administrative: Tech pack version number and date. Brand name and style name/number. Designer contact information. Reference to any physical samples or swatches sent to the factory.
Need Help Creating Your Tech Pack? Our Team Can Build It With You.
Creating a production-ready tech pack can feel overwhelming, especially for first-time brand founders. At Joes Footwear, tech pack development is part of our private label service. Whether you come to us with a fully specified CAD tech pack or a napkin sketch and a reference shoe, our design and pattern engineering team will work with you to create the documentation your project needs.
We offer complimentary tech pack review for brands that already have documentation—send us your tech pack, and we will identify any gaps or ambiguities before development begins, saving you sample iterations and development time.
Start a conversation about your project by contacting our development team. We respond within one business day.
Frequently Asked Questions About Footwear Tech Packs
What is included in a shoe tech pack?
A complete footwear tech pack includes technical drawings from all views, a detailed Bill of Materials listing every component, color specifications with Pantone references, dimensional measurements referencing a base size, construction method and assembly notes, size grading information, logo and branding specifications, and packaging details. The exact content varies by shoe complexity—a simple flat may need 3–4 pages; a multi-component boot may need 8–12.
How much does it cost to create a footwear tech pack?
If you hire a freelance footwear designer, expect to pay $200–$800 per style depending on the shoe’s complexity and the designer’s experience level. In-house design teams at private label manufacturers like Joes Footwear may include tech pack development as part of the overall development fee, which is typically $100–$350 per style (often credited against production orders). PLM platform subscriptions add $50–$300 per month for cloud-based tech pack tools.
Can I create a tech pack without knowing how to use Illustrator?
Yes. While Adobe Illustrator is the industry standard for technical drawings, you can create a functional tech pack using detailed hand sketches, annotated photographs of reference shoes, and specification tables in Excel or Google Sheets. The key is completeness—every material, dimension, and construction detail must be documented regardless of the format. Your factory can convert your documentation into CAD patterns during development.
What is the difference between a tech pack and a spec sheet?
A spec sheet is a subset of a tech pack—it typically contains only the dimensional measurements and grading information. A tech pack is a comprehensive document that includes the spec sheet plus design drawings, the Bill of Materials, construction notes, color specifications, branding details, and packaging instructions. Sending a spec sheet alone without the other components leaves too many decisions to factory interpretation.
How many revisions should I expect during tech pack development?
Most shoes go through 2–3 tech pack revisions during the sampling process. The first revision addresses fit, proportion, and material adjustments identified during the initial sample review. The second revision fine-tunes details like color accuracy, hardware finish, and stitching. Some complex designs require a third revision. Each revision should be documented as a new numbered version of the tech pack, with changes clearly highlighted or listed in a revision log.
Should I send a physical reference shoe to the factory along with my tech pack?
Whenever possible, yes. A physical reference sample eliminates ambiguity about proportions, fit feel, material hand feel, and construction quality in ways that documents and photographs cannot fully convey. Ship the reference shoe via express courier and include it on the tech pack as a documented reference: “Reference shoe: [brand, model, size]. Use as the baseline for overall proportions and fit feel. See tech pack for all material and design modifications.” For more on communicating effectively with manufacturers, see our guide on finding a reliable shoe manufacturer in China.